My Favorite Business & Lettering Tools
My preferred supplies, apps, equipment, and more!
I’ve spent an obscene amount of time researching equipment, applications, software, supplies, and the like for my lettering business. Here’s the full round-up of the things I love and use regularly, in hopes that it’ll make things a little easier for you. Whether you’re totally new to lettering, or an old pro, hopefully you’ll find something in here that makes your life a little nicer.
*Some of the links below are affiliate links. Please be assured I’ve fully vetted everything I recommend below and use every single tool myself!
Primary Lettering Tools
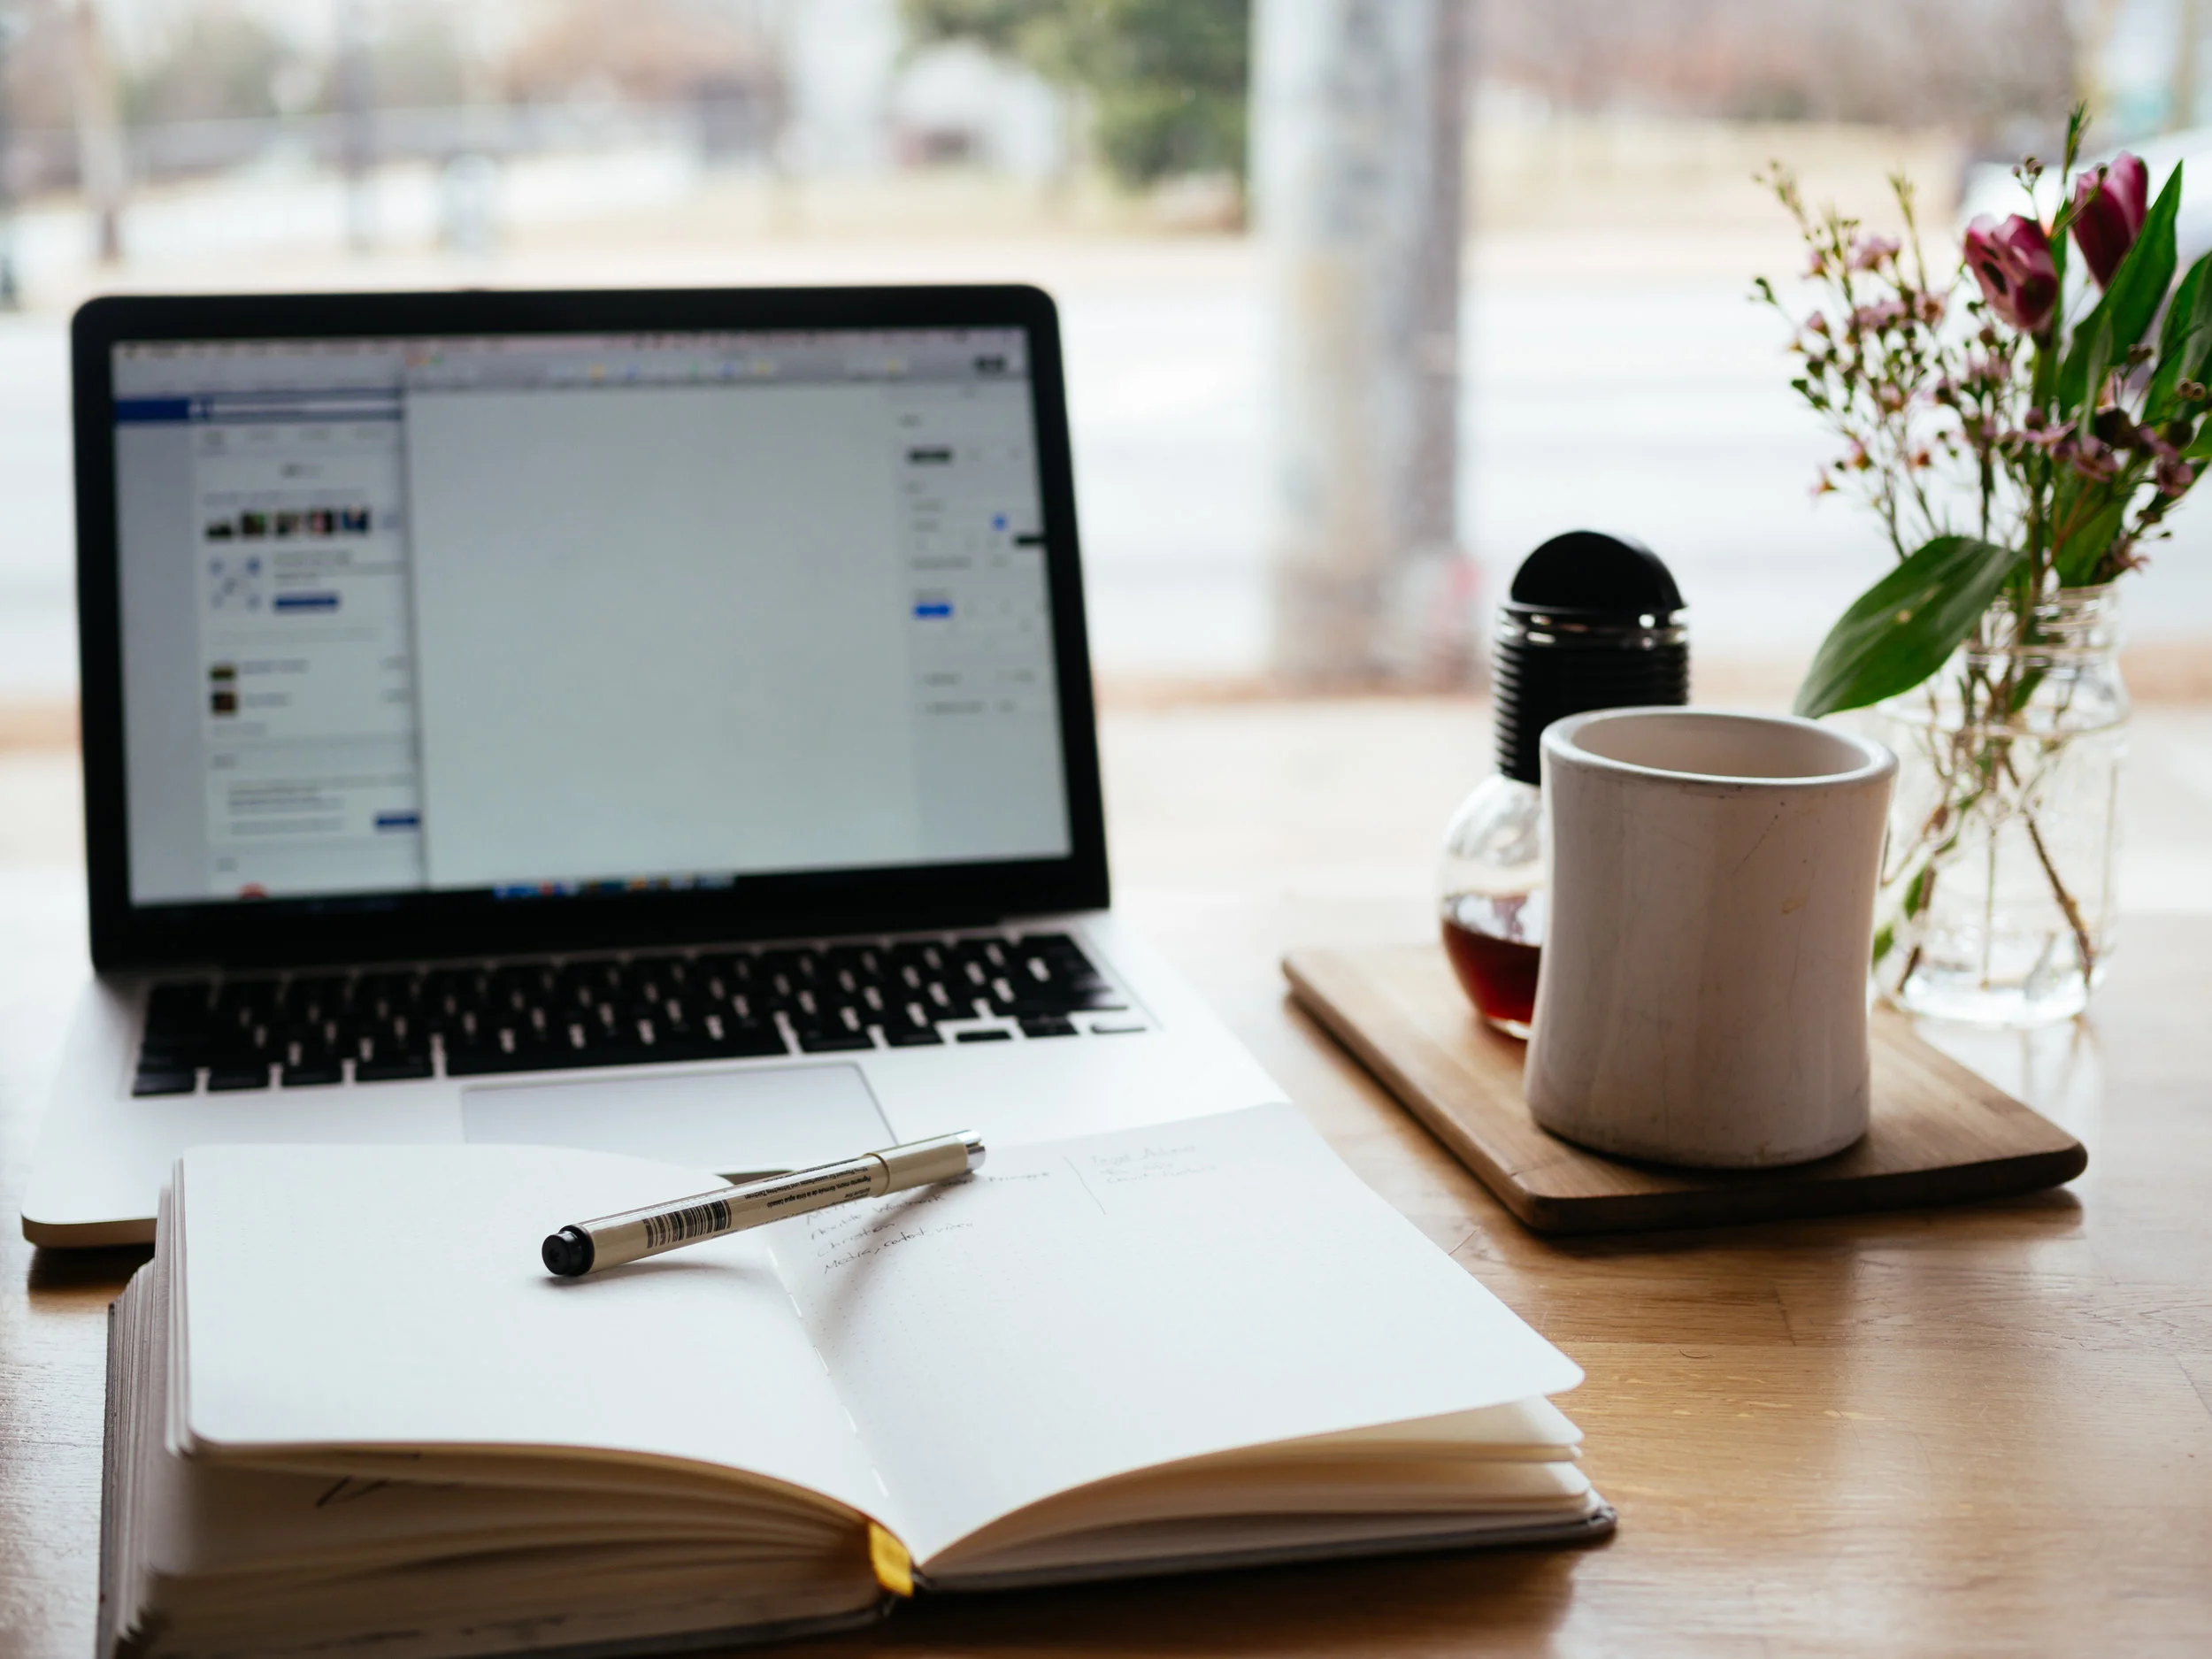
Since I made the investment in an iPad Pro in early 2018, I’ve been creating the majority of my work digitally (the iPad is such a game changer). However, I do love sketching by hand and have a small selection of favorite supplies that I keep close by for analog work. I’ve separated the digital tools from analog below.
Analog Tools
• Micron pens (range of sizes) : These babies have been my go-to tools for inking since design school. They come in multiple colors (although I almost always use black) and a variety of sizes. They’re built for precision, which I love, because I tend to work tight and detailed. I’ve never gotten along with big, loose, brushy pens very well.
• Baron & Fig notebook : This is my favorite notebook. I love the size (I use the 5.4” x 7.7”) and large number of pages. Plus…it opens flat, which is SO important for a sketchbook. You can get dot grid, lined, or blank pages. I always prefer blank.
• BIC Mechanical pencils : I have tried the fancy pencils and the fancy lead and sharpeners. But there’s something about a simple BIC mechanical pencil that just works so well for me. I love starting with really light marks and building up as I go, and the default lead that comes in those pencils is perfect for that.
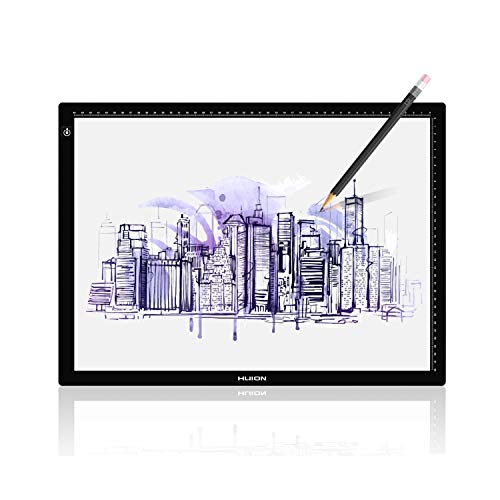
• Light box : A light box is such a handy tool for the sketching and revision process. It’s literally just a box you plug in that lights up so you can see through the pieces of paper that you’re tracing over. In my design school days, we were all too poor to buy light boxes, so we would place sheets of paper over our computer screens and turn up the brightness super high. But that’s pretty awkward and not great on your screen, so I highly recommend this tool if you can swing it! It really doesn’t matter what brand you get, but it is nice to have multiple brightening/dimming settings so you can adjust for whatever kind of substrate you’re tracing over.
Digital Tools

• iPad Pro, 10.5” 256 GB, Rose Gold : This is by far my favorite tool I own and the one thing I’d grab if my house spontaneously caught fire (other than my cats, obviously). I bought mine certified factory refurbished, which means it was previously used, but has gone through some rigorous refreshing including a new battery, new outer shell, a cleaning, any replacement parts necessary, and a 1-year warranty. I highly recommend going factory refurbished. You save a good chunk of money and get what is honestly a brand new iPad.
• Apple pencil : If you’re investing in the iPad Pro for lettering, you’re going to have to get an Apple pencil. It’s pressure sensitive and super responsive. Drawing with the Apple pencil feels just like drawing with a regular pencil, except you have a LOT more mark-making options.
• Procreate App : This is my go-to drawing application. It’s extremely popular with the lettering community, with good reason! Features like layers, clipping masks, symmetry, distortion, blending modes, groups, etc…make it easy to complete an entire piece from start to finish in this one powerful program. There’s no lag at all, and plenty of brushes and customization options are available. For literally $10, you get access to the app forever, including any future updates (and they update quite often!). That’s insane value.
• Procreate Brushes: The brush I use the majority of the time within Procreate is actually the default 6B Pencil. I’ve also made a duplicate of that brush and modified it to cover more surface area—I use that one when I’m filling in lots of flat color, or working in a really big canvas size and need the pixel width of the brush to be larger. In addition to the default brushes, my favorite sets are Ryan Hamrick’s Lettering Brushes, Stefan Kunz’s Grid Builder Brushes (awesome for composition and layout), and Ian Barnard’s Chalk Dust Lettering Kit.
• Apple 29W Charger & Lightning Cable : This is a must if you’re going to be using Procreate, because it burns through battery way faster than any other application I’ve encountered on the iPad. I’m not sure what charger the new iPad Pros come with, but when I bought mine, it came with a puny 12W charger that took like 6-7 hours to charge my iPad. What. Grab you one of these and live a better life (and make sure you get a Lightning to USB-C cable as well—the bundle I linked above comes with one).
• Macbook Pro : I have a Macbook from 2012 that does great (for the most part). Hot tip for those of you transitioning from day jobs: if work has loaned you a laptop, see if they’d be open to letting you buy it when you leave! I bought mine for less that a third of the cost of a brand new laptop. Score!
• Adobe Creative Cloud : I subscribe to all the Adobe apps. If you’re going to use more than one app per month, it probably makes more sense to just pay for the full subscription. I use mostly Photoshop, Illustrator, and Indesign, but am getting into Premiere for video editing and Premiere Rush (which is a really distilled, easy to use version of Premiere…like a nicer version of iMovie).
Photography & Video
In the era of Instagram, it’s becoming more and more important for artists to create really thoughtful, professional looking content to stand out. Here are the tools I use to take high quality photos and videos of my work.
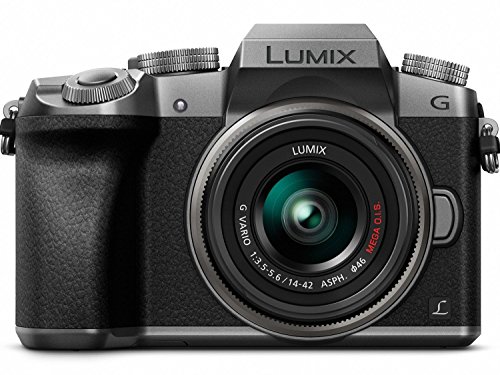
• Panasonic Lumix G7 4K Mirrorless Camera : I spent an awful long time researching what camera to get within my budget (it’s around $500, including the kit lens). I chose this guy because it is super highly regarded for film, but also has the capabilities I need for still photography. It can film 4K video (which is rare in cameras at this price level), has a reversible flip out screen (so you can see your set up if you’re filming yourself), and is really light and easy to carry. As someone with very little photography experience, I’ve definitely had to watch some Youtube videos to get up to speed with camera settings and such. But it’s totally doable to learn from scratch, even if you have zero camera experience. I currently only own the kit lens that comes with the camera, but eventually I’d like a lens that can get to a lower aperture (which really helps with isolating subjects and getting that super nice background blur).
• Vanguard Alta Pro Tripod : I chose this tripod specifically because I like to do flat lays and overhead videos, and it has a central column that allows the camera to face straight down at a 90 degree angle. The legs are individually adjustable, which is also nice.
• Studio FX Soft Box Lighting Kit : This lighting kit is magical. It comes with 3 soft box lights that allow you to set up classic 3-point lighting that looks great for video or product photography. The instructions that came with it left a lot to be desired, so just hop over to youtube for more detailed set up help.

• SanDisk Extreme Pro 64 GB Memory Card : If your camera takes 4K video, make sure your memory card works with 4K. This one does!
• Seamless paper backgrounds : I have white and slate grey seamless paper backgrounds that I use for product photography. I usually tape the paper to a wall and then clamp it to a table or something, but you can create a more professional rig that will result in less waste if you invest in some kind of stand.

• Other photo backgrounds & props: Flooring from Home Depot works great for flat lay backgrounds! You can grab things like laminate wood panels, big tile pieces, slate, etc for super cheap. For photography props, I use little things I already have lying around the house, or buy little trinkets from Target. If you get something new for your shoot, make it something you actually like and can use afterwards. It’s a delightful way to justify writing off cute home decor or office supplies on your taxes ;)
• Blue Yeti Microphone (Whiteout) : This is the microphone I purchased to capture audio for videos / e-courses (I’m working on an art licensing e-course right now—you can sign up for more info over here). You can plug the mic right into your computer and record in an app like garage band. It has several different settings you can use depending on whether you’re recording multiple people at once, or just yourself.
Product-Based Business Tools
In an effort to keep my overhead and product costs down for my paper goods shop, I print, cut, score, and pack my own art prints and cards. It’s time intensive, but not having to commit to large, expensive product runs helps me stay nimble and test the market. I’ll describe the tools I use for this side of my business below.
Tech & Equipment
• Canon PIXMA ip8720 Printer - This printer and I have a love/hate relationship. I love that it accepts heavy paper stocks (I use 110 lb cotton paper for my art prints) and large sheet sizes. It prints really rich colors and I get really nice prints out of it. I hate that, like most inkjet printers, if you don’t use it constantly, the print heads get clogged. That means every few weeks I usually have to flush out the print head by hand to get the ink flowing properly. The quality is really great, but maintenance is annoying.
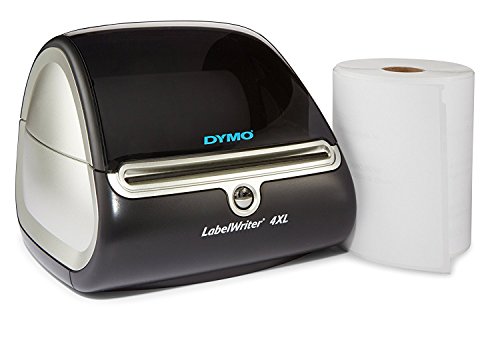
• DYMO LabelWriter 4XL Thermal Label Printer : This magical little shipping label printer makes my life 1000x easier. It NEVER needs ink (it uses heat!) and it prints super fast on peel-and-stick labels. I usually burn through some labels when I put a new roll in while the printer figures out where the labels start and stop. But once it gets that right, it’s seriously such a breeze to use.
Cutting & Scoring

• X-ACTO #1 Precision knife & blade : Nothing fancy here! This trusty little knife works great. Just don’t be stingy with the blades. If you’re starting to get a duller cut, switch out the blade right that moment. Trust me.
• Cutting Mat (18” x 24”) : Again, pretty straightforward. I recommend a bigger mat like this so you can cut larger prints or posters. Be sure to get one with a grid and measurements printed on the surface.
• Martha Stewart Scoring Board : Another magical, magical tool. Thanks, Martha! This is how I score my greeting cards to get a perfect fold. It comes with a bone folder and has grooves every 1/8” that you can use to guide your score. It also comes with a guide to help you make your own envelopes, if that interests you!
Applications & Platforms
• Quickbooks : I had help from an accountant in setting up my books and learning some basics. But now, I keep my books all by myself (although I do use a CPA for my taxes cause that ‘isht is rough). Quickbooks is pretty overwhelming if you’re starting with literally zero accounting experience, but if you’re willing to do some learnin’, it’s a realllllyyy great tool. In addition to keeping records and recording your sales and expenses, you can track sales tax, send invoices (and clients can pay directly though Quickbooks!), generate reports, and all sorts of stuff. There are some apps you can connect with Quickbooks, but in my experience they haven’t worked very well. I’ve used the Square Quickbooks app that imports my craft fair sales, but it often formats them in weird ways…maybe it’s just me?
• Square : Square offers card readers & payment processing. I plug my Square reader right into my phone and use it to swipe credit cards at craft fairs and pop ups. You can set up your products and prices ahead of time, so checkout is quick and easy.
• Iconosquare : This is a social media planning app that I use to schedule Instagram posts. It’s kind of frustrating that, over time, they’ve introduced features like being able to plan carousel posts and stories, but made them only available to higher paying plans. Dumb. My favorite feature in Iconosquare is the ability to preview your scheduled posts and see how they will all look together in order on your page.
• Linktree : Your Instagram profile only allows for ONE link, which can be so annoying. To get around this issue, Linktree basically hosts multiple links at one web address for you. I just use their basic, free version and it works great for me!
• Shipstation : Gosh, I love Shipstation. You can import all your online orders into this one platform and create shipping labels. You can set up default shipping settings that you use often, split orders into multiple shipments, add insurance and tracking, ship internationally, etc… I import both of my Squarespace shops into Shipstation, and when I create and print a shipping label for an order, it automatically sends an email with tracking info to the customer. How nice is that?
• Squarespace : I use Squarespace for hosting and building my website. It has such beautiful templates and excellent UX. It has great integrations with other apps, and more get added all the time. Like I said, the integration with Shipstation saves my life. Squarespace also links up with Stripe and PayPal to process customer payments. A more recent but exciting integration is with Unsplash, an amazing (and FREE) source for beautiful stock photography. You can buy your domain through Squarespace, and also purchase a corresponding email address. Although I haven’t tried it out, I’ve seen that they’ve recently launched in-platform e-mail marketing capabilities. It’s pretty ideal, at least in theory, to be able to create e-mails that automatically inherit fonts and styles from your website, and can quickly pull in products, blog posts, or features to highlight.
• Mailchimp : At the moment, my e-mail marketing is through Mailchimp. People can sign up for my list on Squarespace (their information gets automatically imported into Mailchimp), or I can manually input their names and e-mail addresses. Mailchimp allows you to create and schedule campaigns, create automations that are triggered by various activities (like, it can send a specific, pre-made email to someone who signs up for your new e-course, for example), and you can group and segment your list in losts of different ways. It’s super powerful and FREE, until you surpass a certain number of contacts on your lists.
• Tailwind : While I’m not currently using Tailwind, I wanted to mention it as it is pretty cool. Tailwind lets you schedule your Pinterest pins and optimize your timing and tags for optimum engagement. I did the 30 day free trial and my monthly viewers went up a ton. I was honestly overwhelmed by all the things I had going on and didn’t want to add this to my list too, so I decided not to continue with the paid plan (for now). But if Pinterest is something you want to get into, this is an awesome tool.
